


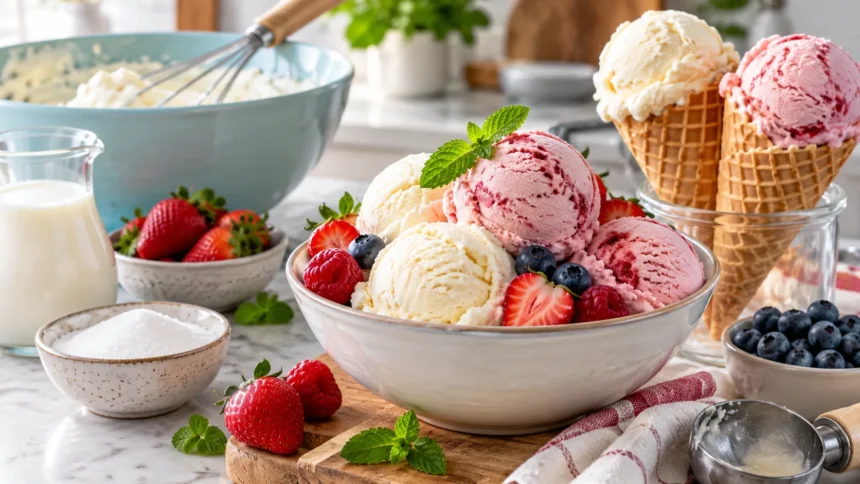
How to Make Easy Homemade Ice Cream at Home
Making homemade ice cream is a simple way to enjoy a creamy, refreshing dessert without purchasing expensive equipment. With a few everyday ingredients, you can prepare delicious vanilla ice cream in your own kitchen. This easy homemade ice cream recipe requires no ice cream maker, complicated techniques, or cooking experience. It is a convenient dessert for family gatherings, celebrations, or relaxing weekends.
Traditional ice cream recipes often involve heating a custard mixture, cooling it, and using a machine to churn the ingredients. However, a no-churn ice cream recipe simplifies the process while maintaining a smooth, creamy texture. The combination of whipped heavy cream and sweetened condensed milk forms the base. Vanilla extract adds a familiar flavor that works beautifully with different toppings.
The best part of making ice cream at home is having control over the flavors and additional ingredients. You can include chocolate chips, fresh fruit, crushed cookies, or caramel according to your preferences. The basic recipe is beginner-friendly and requires very little hands-on preparation. With proper freezing and storage, you can enjoy a satisfying frozen dessert whenever you like.
Why Homemade Ice Cream Is Worth Making
Homemade ice cream allows you to select ingredients and adjust flavors based on your personal preferences. Instead of relying on a particular store-bought variety, you can experiment with different combinations using ingredients already available in your kitchen. This flexibility makes homemade frozen desserts enjoyable for families. It also encourages creativity without requiring advanced cooking techniques.
Another advantage is the convenience of preparing ice cream without specialized equipment. A mixing bowl, electric mixer, spatula, and freezer-safe container are enough for this recipe. You can prepare the mixture in approximately fifteen minutes before transferring it to the freezer. Most of the preparation time involves waiting for the dessert to become firm.
Making ice cream at home can also be a fun kitchen activity for families and beginners. Measuring ingredients, whipping cream, and choosing mix-ins are straightforward tasks that can be shared. The recipe is easy to customize for birthdays, holidays, and special occasions. Homemade ice cream adds a personal touch to an everyday dessert.
Ingredients Needed for Easy Homemade Ice Cream
The main ingredients in this homemade vanilla ice cream recipe are heavy whipping cream, sweetened condensed milk, and vanilla extract. Heavy cream gives the mixture its rich texture, while condensed milk adds sweetness and helps reduce iciness. Vanilla extract brings a familiar flavor that complements the creamy base. These three ingredients are enough to prepare delicious no-churn ice cream.
For approximately eight servings, use two cups of cold heavy whipping cream, one 14-ounce can of sweetened condensed milk, and two teaspoons of vanilla extract. Choose heavy cream containing approximately 35% milk fat or more for reliable whipping. Make sure the condensed milk is sweetened rather than evaporated milk. These details are important for achieving the intended consistency.
Optional ingredients include chocolate chips, chopped nuts, cookie pieces, fruit puree, or flavored sauces. These additions allow you to prepare different varieties without changing the basic method. Use moderate amounts so the mixture remains easy to fold and freeze evenly. For your first attempt, plain vanilla is a good starting point.
Kitchen Tools You Need to Make Ice Cream
One reason this easy homemade ice cream recipe is popular is that it requires only basic kitchen equipment. You will need a large mixing bowl, an electric hand mixer or stand mixer, and a flexible spatula. A freezer-safe container with a tightly fitting lid is also important. Measuring cups and spoons help maintain consistent ingredient proportions.
An electric mixer makes whipping heavy cream easier and faster, especially when preparing larger batches. A whisk can also work, although achieving stiff peaks by hand requires more effort. Use a clean mixing bowl that is large enough to accommodate the expanding cream. Chilling the bowl beforehand may help the cream whip efficiently.
Choose a shallow or medium-depth freezer-safe container that allows the mixture to freeze relatively evenly. A metal loaf pan works well, but a suitable plastic or glass freezer container can also be used. Covering the surface helps reduce exposure to freezer air. Proper equipment supports a smoother texture and makes preparation more convenient.
How to Make Homemade Ice Cream Step by Step
Begin by placing the cold heavy whipping cream into a large mixing bowl. Beat it with an electric mixer at medium speed until soft peaks form, then continue carefully until stiff peaks develop. The cream should hold its shape without becoming grainy or separating. Avoid excessive whipping because overworked cream can begin turning into butter.
In a separate bowl, combine the sweetened condensed milk and vanilla extract until evenly mixed. Add a small portion of whipped cream and stir gently to lighten the condensed milk mixture. Next, fold the remaining whipped cream into the bowl using a spatula. Use slow movements to preserve as much of the incorporated air as possible.
Transfer the combined mixture into a freezer-safe container and smooth the top with your spatula. Cover it tightly and place it in the freezer for at least six hours, preferably overnight. Once the ice cream becomes firm, allow it to soften briefly before scooping. Serve it plain or with your favorite dessert toppings.
How Long Does Homemade Ice Cream Take to Freeze?
Freezing time is an important part of making homemade ice cream because the mixture needs sufficient time to become scoopable. Most no-churn ice cream recipes require approximately six to eight hours in a typical home freezer. The exact duration depends on the container size, mixture depth, and freezer temperature. Overnight freezing is often the most convenient approach.
A shallow container may help the ice cream firm up more evenly than a very deep container. Keep the freezer near its recommended temperature of 0°F or -18°C for reliable storage. Avoid repeatedly opening the freezer or removing the container during the initial freezing period. Stable temperatures help the mixture freeze consistently.
After freezing, homemade ice cream may feel firmer than some commercially prepared varieties. Leave the container at room temperature for approximately five to ten minutes before scooping, depending on its firmness. Avoid leaving it out long enough to melt significantly. Gentle softening makes serving easier while helping preserve the dessert’s texture.
Why Heavy Cream Is Important for Homemade Ice Cream
Heavy cream is a key ingredient because its relatively high fat content contributes to a rich, smooth mouthfeel. When whipped, the cream incorporates air and increases in volume. These tiny air bubbles help make no-churn ice cream lighter than a simple frozen milk mixture. The result is a creamy texture without requiring a traditional ice cream machine.
The temperature of the cream can influence how effectively it whips. Cold cream generally forms stable peaks more easily than cream that has become warm. For better results, refrigerate the cream until you are ready to use it. A chilled mixing bowl can also be helpful, particularly in a warm kitchen.
Replacing heavy cream with regular milk will significantly change the recipe because milk cannot be whipped in the same way. The finished dessert may become icy rather than light and creamy. If you want a lower-fat alternative, it is better to follow a recipe specifically designed for that purpose. Suitable ingredients are essential for the structure of this no-churn method.
What Does Sweetened Condensed Milk Do in Ice Cream?
Sweetened condensed milk contributes sweetness, milk solids, and a smooth consistency to homemade ice cream. It contains concentrated milk and added sugar, giving it a thick texture. When combined with whipped cream, it helps form a rich mixture that freezes without becoming excessively icy. This makes it especially useful in recipes that do not involve churning.
The sugar in condensed milk helps lower the freezing point of the mixture, influencing how firm the final dessert becomes. Its concentrated milk components also contribute to a creamy mouthfeel. These properties help compensate for the absence of a traditional custard base. As a result, the recipe requires fewer ingredients and preparation steps.
It is important not to confuse sweetened condensed milk with evaporated milk. Evaporated milk is unsweetened and has a different consistency and composition. Using it as a direct replacement will change the sweetness and freezing behavior of the ice cream. Follow the specified ingredient quantities for predictable results.
How to Make Vanilla Ice Cream Taste Better
Vanilla is a classic ice cream flavor because it pairs well with milk, cream, chocolate, and fruit. Good-quality vanilla extract can give homemade ice cream a pleasant aroma and balanced sweetness. Pure vanilla extract and vanilla bean paste are both useful options. The quantity can be adjusted slightly according to your preferred flavor intensity.
For a stronger vanilla flavor, you can use a small amount of vanilla bean paste or seeds from a vanilla pod. These additions bring a distinctive aroma and tiny visible vanilla specks. A very small pinch of salt can also help balance sweetness. Avoid adding excessive liquid flavoring because it may influence the final consistency.
The flavor of homemade vanilla ice cream can develop further as the mixture freezes. Before freezing, taste the base and decide whether the vanilla level suits your preferences. Remember that cold temperatures can make sweetness and certain flavors seem less intense. Small adjustments help personalize the recipe without complicating the method.
Easy Chocolate Homemade Ice Cream Recipe
Chocolate ice cream is a popular variation that can be prepared using the same no-churn base. Begin with the standard mixture of whipped heavy cream and sweetened condensed milk. Add cocoa powder or cooled melted chocolate to introduce a rich chocolate flavor. The exact amount depends on how strong you want the finished dessert to taste.
For a simple version, whisk approximately one-third cup of unsweetened cocoa powder into the condensed milk before adding the whipped cream. Stir until the mixture becomes smooth and free from visible lumps. You may also include a small amount of vanilla extract to complement the chocolate. Fold the whipped cream in gently before transferring everything to the freezer.
Chocolate chips, brownie pieces, or chocolate cookie crumbs can make the dessert more interesting. Fold these ingredients into the mixture after combining the base. Avoid adding too many solid pieces because they can make scooping difficult. Freeze the ice cream until firm and serve with chocolate sauce if desired.
How to Make Strawberry Ice Cream at Home
Strawberry ice cream brings a refreshing fruit flavor to the basic homemade recipe. Fresh strawberries work well when they are ripe, sweet, and full of flavor. Frozen strawberries can also be used after thawing and draining excess liquid. Preparing the fruit correctly helps prevent the ice cream from becoming watery or excessively icy.
Wash and remove the green tops from approximately one cup of strawberries before blending them into a puree. For a more concentrated flavor, gently cook the puree until some moisture evaporates, then cool it completely. Mix the cooled puree into the sweetened condensed milk. Carefully fold in the whipped cream until evenly combined.
For additional texture, add a few finely chopped strawberry pieces before freezing. Keep these pieces small because large frozen fruit chunks can become hard. Transfer the mixture to a covered container and freeze until firm. The finished dessert has a fruity flavor that works well during warm weather.
Make Cookies and Cream Ice Cream Without a Machine
Cookies and cream ice cream is another easy variation of the basic no-churn recipe. It combines a sweet vanilla base with crushed chocolate sandwich cookies for added flavor and texture. The recipe requires no additional cooking or complicated preparation. It is particularly convenient when you want a familiar dessert with a simple homemade twist.
Prepare the vanilla ice cream mixture using cold heavy cream, sweetened condensed milk, and vanilla extract. Crush approximately eight to twelve chocolate sandwich cookies into small and medium-sized pieces. Fold most of the pieces into the prepared mixture using a spatula. Reserve a small amount for sprinkling over the top.
Transfer the cookie mixture into a freezer-safe container and distribute the remaining crumbs across the surface. Cover tightly and freeze for approximately six to eight hours. The cookies may soften slightly as they absorb moisture from the cream. This variation works well as a scoopable dessert or a filling for homemade ice cream sandwiches.
Best Toppings for Homemade Ice Cream
Toppings are a simple way to customize homemade ice cream without changing the original recipe. Fresh berries, sliced bananas, chopped nuts, and chocolate shavings add different flavors and textures. Caramel sauce, chocolate syrup, or fruit compote can bring extra sweetness. The best combination depends on the flavor of the ice cream and your preferences.
For vanilla ice cream, strawberries and chocolate sauce are familiar options that complement its creamy flavor. Chocolate ice cream pairs well with crushed nuts or small cookie pieces. Fruit-based varieties often taste refreshing with fresh fruit slices. Experimenting with contrasting textures can make a simple dessert more enjoyable.
Serve toppings separately when preparing ice cream for a family gathering or celebration. This allows everyone to choose their preferred additions and adjust the amount. Keep perishable toppings refrigerated until serving. A small selection of toppings can turn a basic homemade dessert into a customizable ice cream experience.
Common Mistakes to Avoid When Making Homemade Ice Cream
One common mistake is using cream that is not cold enough to whip properly. Warm cream may struggle to reach the consistency required for a light no-churn base. Another mistake is overwhipping until the cream becomes grainy and begins separating. Stop mixing once it forms stiff peaks that hold their shape.
Mixing the whipped cream too aggressively with condensed milk can also affect the texture. Vigorous stirring removes much of the air incorporated during whipping. Use a gentle folding technique to keep the mixture airy. This step helps maintain a lighter consistency after freezing.
Incorrect storage can cause additional problems, including ice crystals and unwanted freezer odors. Leaving the container uncovered exposes the ice cream to circulating freezer air. Frequent melting and refreezing can also damage its texture. Using a sealed container and maintaining a consistent freezer temperature helps preserve quality.
How to Make Homemade Ice Cream Creamier
A creamy texture depends on the balance of ingredients, incorporated air, and freezing conditions. Heavy whipping cream provides fat and helps trap air during mixing. Sweetened condensed milk contributes sugar and milk solids that influence freezing behavior. Using the correct proportions supports a smooth dessert without requiring an ice cream maker.
Whip the cream carefully until it reaches stiff peaks, but avoid continuing once it starts looking grainy. Fold the remaining ingredients gently to preserve the mixture’s airy structure. Use a container that allows the dessert to freeze evenly. These straightforward techniques can noticeably improve the finished consistency.
Proper storage also helps maintain the creamy texture after the ice cream has frozen. Keep the container covered and return it to the freezer promptly after serving. Allow firm ice cream to soften briefly instead of trying to scoop it immediately. Avoid repeatedly allowing the entire container to melt and freeze again.
How to Store Homemade Ice Cream Properly
Homemade ice cream should be stored in a freezer-safe container with a secure lid. An airtight seal reduces exposure to freezer air and helps limit ice crystal formation. Containers designed for frozen desserts are convenient, but a suitable covered loaf pan can also work. Labeling the container with the preparation date makes storage easier to manage.
For the best flavor and texture, enjoy homemade no-churn ice cream within approximately two weeks. It may remain safe longer when continuously frozen at 0°F or -18°C, but its quality can gradually decline. Homemade varieties lack some of the stabilizing ingredients used in commercial products. This makes careful storage particularly important.
Always use a clean scoop when serving the ice cream and avoid leaving the container at room temperature unnecessarily. If the dessert becomes completely melted or is held warm for an extended period, do not simply refreeze it for later consumption. Safe handling helps prevent food-related problems. Proper storage also preserves the intended flavor and texture.
How to Serve Homemade Ice Cream for Any Occasion
Homemade ice cream works well for family dinners, birthday parties, weekend desserts, and warm afternoons. Its simple flavor can complement cakes, brownies, pies, and fresh fruit. You can serve it in bowls, cones, or dessert glasses depending on the occasion. The same basic recipe can be adapted to many different serving ideas.
For an easy ice cream sundae, place one or two scoops in a small bowl and add your favorite toppings. Chocolate sauce, chopped fruit, and crushed cookies work well together. You can also serve vanilla ice cream alongside warm apple pie or chocolate cake. The contrast between warm desserts and cold ice cream can be especially enjoyable.
When serving a group, scoop portions shortly before dessert time to keep them from melting. Arrange toppings in separate containers so guests can personalize their portions. Keep the remaining ice cream in the freezer until needed. A little preparation makes serving homemade frozen desserts convenient and enjoyable.
Conclusion
This easy homemade ice cream recipe demonstrates how a few simple ingredients can become a creamy and enjoyable frozen dessert. Heavy whipping cream, sweetened condensed milk, and vanilla extract form the foundation of the no-churn method. The preparation requires minimal equipment and approximately fifteen minutes of hands-on work. After freezing, the mixture becomes a scoopable dessert suitable for many occasions.
Homemade ice cream is also easy to customize with ingredients such as cocoa powder, strawberries, crushed cookies, and chocolate chips. Small adjustments allow you to experiment with flavors while keeping the preparation straightforward. Careful whipping, gentle folding, and proper freezing help maintain a pleasant texture. These techniques make the recipe accessible to beginners.
Whether you are preparing dessert for your family or trying a new kitchen activity, homemade ice cream is a practical choice. Following the recommended ingredient measurements and storage guidelines supports consistent results. You can enjoy it plain or serve it with a selection of toppings. With this simple method, delicious no-churn ice cream can become an easy addition to your homemade dessert collection.
Frequently Asked Questions (FAQs)
Can I Make Homemade Ice Cream Without an Ice Cream Maker?
Yes, homemade ice cream can be made without a machine using whipped heavy cream, sweetened condensed milk, and vanilla extract. Combine the ingredients gently and freeze the mixture until firm.
How Long Does Homemade Ice Cream Take to Freeze?
Most no-churn homemade ice cream requires approximately six to eight hours in a freezer. Freezing overnight often gives the mixture enough time to become firm and easy to scoop.
Can I Use Regular Milk Instead of Heavy Cream?
Regular milk cannot directly replace heavy whipping cream in this no-churn recipe because it does not whip into stable peaks. A different recipe designed for milk would be needed.
Why Is My Homemade Ice Cream Icy Instead of Creamy?
An icy texture may result from excess water, unsuitable ingredient ratios, or repeated temperature changes. Using heavy cream, sweetened condensed milk, gentle folding, and proper freezer storage helps improve creaminess.
How Long Can Homemade Ice Cream Stay in the Freezer?
Homemade no-churn ice cream is best enjoyed within approximately two weeks for optimal flavor and texture. Keep it tightly covered at 0°F or -18°C and avoid repeated melting and refreezing.