

Introduction to Home Chemistry Experiments
The world of chemistry is not limited to the confines of a laboratory; in fact, conducting chemistry experiments at home can be an inspiring and educational experience for students. Hands-on learning plays a crucial role in comprehending complex scientific concepts, particularly in the field of chemistry where understanding reactions and interactions is essential. Home chemistry experiments offer a unique opportunity to engage students in the practical application of theoretical knowledge, allowing them to witness chemical reactions firsthand.
One of the most compelling aspects of easy chemistry experiments at home is their ability to spark interest in science among students. When children participate in interactive experiments, they are more likely to develop a passion for learning and exploration. The excitement of mixing substances and observing changes reinforces scientific principles, making abstract ideas more tangible and relatable. These experiments promote critical thinking, as students hypothesize outcomes, observe results, and synthesize their findings.
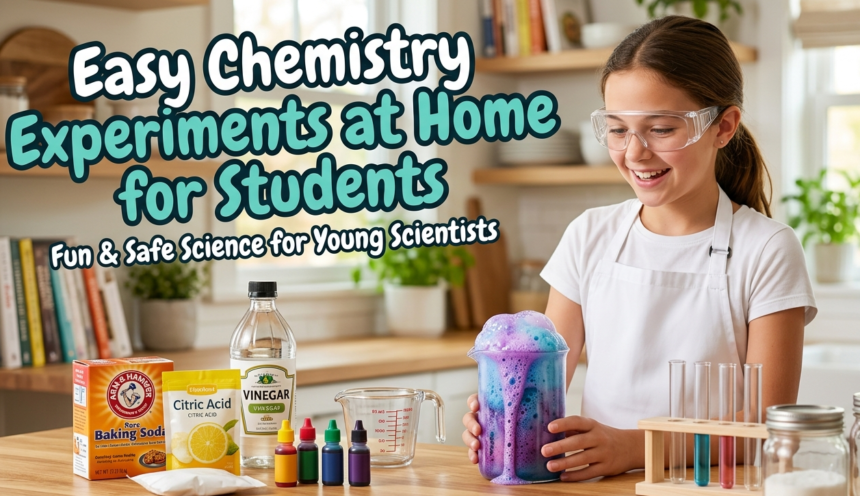
For home experiments, students need not rely on specialized equipment or exotic chemicals. Many materials commonly found in households serve well in demonstrating fundamental chemistry concepts. Common items such as baking soda, vinegar, food coloring, and soap can be used to create captivating experiments that illustrate reactions, changes in states, and other chemical phenomena. This accessibility not only makes chemistry fun but also fosters independence in students as they learn to conduct experiments responsibly under adult supervision.
By encouraging curiosity and promoting experiential learning, home chemistry experiments can significantly enhance a student’s educational journey, providing a strong foundation in scientific literacy and inquiry, which is increasingly essential in today’s technology-driven society.
Safety Precautions in Home Chemistry
Safety should always be the foremost consideration when conducting any chemistry experiments at home. Engaging in experiments can be an exciting way to learn about science, but it is vital to approach these activities responsibly to mitigate the risks of accidents and injuries.
One of the fundamental safety practices involves personal protective equipment (PPE). Wearing safety goggles is essential to protect the eyes from splashes or harmful substances. This precaution is critical as many household chemicals can cause irritation or damage if they come into contact with the eyes. Additionally, gloves should be worn when handling chemicals to prevent skin contact with potentially hazardous materials. It is also advisable to wear appropriate clothing, such as long sleeves, to minimize skin exposure during experiments.
Proper handling and storage of materials are equally important. Ensure that all chemistry equipment and chemicals are kept out of reach of children and pets, and avoid using damaged or cracked glassware. When working with volatile substances or reactions that may release fumes, it is advisable to conduct experiments in a well-ventilated area, preferably outdoors or near a window. Always read labels on household chemicals to understand their properties and potential hazards.
Another aspect to consider is the disposal of chemicals and waste generated during experiments. Follow local regulations regarding the disposal of chemical substances, as improper disposal can pose environmental risks. Familiarizing oneself with the specific hazards associated with common household chemicals, such as vinegar, baking soda, or bleach, is vital to conducting chemistry experiments safely.
By observing these essential safety precautions, students can safely explore the fascinating world of chemistry right from the comfort of their homes. Implementing these practices ensures a learner-centric environment that is both educational and secure, allowing experimentation to be an enjoyable and enlightening experience.
Essential Materials for Home Chemistry Experiments
Performing chemistry experiments at home can be an exciting and educational experience for students. However, having the right materials is crucial for successfully conducting these experiments. Fortunately, many essential items can be commonly found in most households, making it easy to get started with chemistry at home.
One of the most versatile ingredients is baking soda, or sodium bicarbonate. It can be utilized in various experiments, such as demonstrating acid-base reactions when combined with vinegar. The reaction produces carbon dioxide gas, leading to observable fizzing. Additionally, vinegar, an acid commonly used in cooking, can also serve as another crucial component in experiments, particularly for exploring pH levels or creating volcanic eruptions.
Food coloring is another readily available material that adds visual appeal to experiments. It can be used in conjunction with water to create colorful reactions or to observe diffusion in liquids. By adding food coloring to different solutions, students can witness how substances interact on a molecular level.
Salt is yet another household staple that can be incorporated into experiments. It can be dissolved in water to explore solutions and solubility, setting the stage for investigations into crystallization or evaporation. For instance, students can create salt crystals through the slow evaporation of a saltwater solution.
Lastly, water, the most essential ingredient, is key to conducting a myriad of experiments. Whether it’s investigating density by layering liquids or observing temperature changes during exothermic or endothermic reactions, water serves as a fundamental solvent in many chemical processes and experiments.
In conclusion, each material mentioned plays a vital role in conducting engaging home chemistry experiments. By utilizing common household supplies such as baking soda, vinegar, food coloring, salt, and water, students can embark on a journey of discovery and learning right from the comfort of their homes.
Simple Acid-Base Reactions
Acid-base reactions are among the simplest yet most fascinating chemistry experiments that can be conducted at home using common household items. A prominent example involves the combination of vinegar, an acid, and baking soda, a base. When these two substances react, they produce carbon dioxide gas, which can be observed as bubbles forming during the reaction.
To carry out this experiment, the necessary materials include a small bowl or container, vinegar, baking soda, and optional food coloring to enhance the visual effects. Begin by measuring approximately one tablespoon of baking soda and placing it in the bowl. Next, gradually pour in half a cup of vinegar while observing the reaction. The effervescence indicates the release of carbon dioxide, producing an engaging display of bubbles.
The chemical reaction can be represented by the equation: CH₃COOH (acetic acid) + NaHCO₃ (sodium bicarbonate) → CO₂ (carbon dioxide) + H₂O (water) + CH₃COONa (sodium acetate). Understanding this equation highlights the breakdown of the reactants into products, underlining the fundamental principles of acid-base chemistry. It is critical to emphasize safety during this experiment; while the ingredients are non-toxic, conducting the experiment in a well-ventilated area and using appropriate containers can prevent any unintended spills or mess.
Additionally, variations of this experiment can be introduced by changing the ratio of vinegar to baking soda or incorporating different containers to observe the impact on the reaction’s intensity. These simple acid-base experiments not only demonstrate chemical principles in practice but also serve as an excellent introduction for students to the engaging world of chemistry.
Exploring Chemical Reactions with Food Coloring
Food coloring is an excellent tool for demonstrating chemical reactions and diffusion principles in a visually engaging manner. One common experiment involves creating a color wheel, which allows students to observe the mixing and diffusion of various liquid solutions.
To conduct the color wheel experiment, gather the following materials: several small cups, clear water, food coloring in primary colors (red, blue, yellow), and a white plate. Fill each cup with a small amount of water and add one drop of each food coloring to separate cups, ensuring that you have red, blue, and yellow liquids. Next, place the cups in a circular arrangement on the plate such that they are close but not touching.
With these cups arranged, the next step is to carefully pour water into the empty spaces between the cups. As the colored liquids mingle, students can observe how they diffuse into the surrounding water, creating vibrant new hues. This diffusion process showcases the principles of solubility and concentration gradient.
Another experiment involves the classic volcano reaction. For this, you will need food coloring, baking soda, vinegar, and a container (such as a plastic bottle). Students should first add a few tablespoons of baking soda into the container and then mix in a few drops of food coloring. Upon adding vinegar, a vigorous chemical reaction will occur, resulting in an exciting eruption of colored foam. This illustrates both the chemical reaction between the acid (vinegar) and the base (baking soda) as well as the concept of reaction rates.
Through these simple yet effective experiments with food coloring, students can grasp underlying chemistry principles while enjoying a hands-on approach to learning. Each activity not only highlights essential reactions but also reinforces the observation skills critical for any budding scientist.
Creating Slime: A Fun Chemistry Experiment
Creating slime is an engaging and educational chemistry experiment that provides students with hands-on learning about polymers and chemical reactions. The process involves simple ingredients, making it accessible for experimentation at home. To create slime, one needs basic supplies such as white glue, borax, and water. The steps are straightforward: mix one cup of glue with half a cup of water in a bowl. In a separate container, dissolve one teaspoon of borax in one cup of warm water. After both mixtures are prepared, gradually combine the borax solution into the glue mixture while stirring continuously.
This interaction triggers the formation of a polymer, which is a long chain of molecules that connects the glue’s components. As students mix the two solutions, they will observe the slime beginning to form, transitioning from a liquid state to a more viscous, stretchy consistency. This metamorphosis illustrates the fascinating principles behind non-Newtonian fluids, where the behavior changes under different types of stress or force.
Moreover, students can engage their creativity by modifying their slime with various add-ins, such as food coloring, glitter, or even scented oils. This customization not only enhances the sensory experience but may also spark discussions about the chemical properties of the additives being used. The science behind slime is rich, offering insights into molecular interactions and the properties of materials. As students explore different formulations, they learn about variables such as viscosity and elasticity, linking their practical work with fundamental concepts in chemistry.
Through this fun experiment, learners can foster a deeper appreciation for chemistry, while also embracing the trial and error process inherent in scientific exploration.
Understanding Density through Liquid Layers
Density is a fundamental concept in chemistry that refers to the mass of a substance divided by its volume. Understanding density can be made engaging through simple at-home experiments involving liquids. In this section, we will explore how to create distinct layers of liquids using sugar, water, and oil, illustrating their differing densities in a visually captivating way.
The first step in conducting this experiment is to gather your materials: sugar, water, cooking oil, a transparent container, and food coloring for effect. Begin by creating a sugar solution. In a separate container, mix about four tablespoons of sugar into 100 ml of hot water to ensure the sugar dissolves completely. This solution will have a higher density than plain water due to the added sugar.
Next, take your transparent container and carefully pour the sugar solution into it. Make sure to do this gently to avoid mixing with the subsequent layers. After the sugar solution, slowly add plain water. It is crucial to perform this step carefully; one effective method is to tilt the container and pour the water down the side, minimizing disturbance. Since the density of plain water is lower than that of the sugar solution, it will float on top.
Now, it is time to add the cooking oil. Similar to the previous step, gently pour the cooking oil on top of the water, allowing it to form a distinct layer. The oil’s density is significantly lower than both the sugar solution and water, causing it to float above them. Optionally, adding food coloring to the water can enhance the visual effect, making the distinct layers more pronounced.
This experiment beautifully illustrates the concept of density, as each liquid occupies its own layer based on its unique density. Through this experiment, students can observe firsthand how denser liquids sink while less dense liquids rise, providing a clear visual representation of the principles of density in action.
Making a Volcano: An Engaging Experiment
Creating a simple volcano is a fascinating and educational chemistry experiment that students can easily perform at home. To begin, gather everyday materials such as baking soda, vinegar, food coloring, and a container for the volcano structure. A plastic bottle or a mound of clay can serve as the central chamber. Start constructing the volcano by shaping the clay around the base of the bottle to create a mountain-like appearance.
Once the structure is ready, it is time to mix the ingredients that will produce the volcanic eruption. Place two to three tablespoons of baking soda into the bottle. Baking soda, or sodium bicarbonate, is a base that will react with an acid during this experiment. Next, add a few drops of food coloring to mimic lava, providing a visually appealing effect during the explosion. The next step involves pouring vinegar into the bottle, which acts as the acid in this chemical reaction.
When vinegar is added to baking soda, carbon dioxide gas is produced, leading to an impressive eruption. This reaction creates bubbles, causing the mixture to overflow from the bottle, resembling lava spilling from a volcano. Observing this reaction helps students understand the basics of acid-base chemistry, as well as the process of gas formation and pressure release. Furthermore, the experiment offers an opportunity to discuss geological science concepts, including volcanic activity and the structure of volcanoes.
This volcano experiment not only captures the interest of students but also reinforces key scientific principles in both chemistry and geology. By engaging in such hands-on activities, students can better grasp these concepts and encourage a lasting curiosity for science.
Conclusion and Further Experimentation Ideas
Conducting chemistry experiments at home provides numerous benefits for students. Engaging in hands-on activities allows learners to deepen their understanding of fundamental concepts while fostering a passion for science. These home-based experiments can enhance critical thinking, develop problem-solving skills, and increase scientific literacy in an exciting and interactive manner. Beyond the basic experiments discussed previously, the realm of chemistry is vast and filled with countless opportunities for exploration.
Students are encouraged to think creatively and venture into their own experimental ideas. More advanced projects may include exploring the principles of electrolysis, synthesizing simple esters, or investigating the pH levels of various household substances. Each of these experiments can provide insight into the chemical reactions that occur around us every day.
Additionally, several online platforms and resources offer tutorials and inspiration for further chemistry projects suitable for home experimentation. Websites dedicated to science education, such as educational YouTube channels or interactive learning sites, can serve as invaluable tools for students looking to expand their knowledge. Books on chemistry experiments can also provide guided procedures, safety information, and explanations that enhance both understanding and safety practices in the home laboratory.
Ultimately, chemistry is not just a subject studied in schools; it is a discipline that encapsulates the world around us. By continuing to experiment and discover, students can not only broaden their scientific horizons but also ignite a lifelong relationship with the wonders of chemistry. Encouragement from parents and educators is crucial in this journey, promoting a culture where curiosity leads to exploration and learning.
